

No products in the cart.
Return To Shop


Wishlist Please, enable Wishlist.


Sale 50%


Lightburn camera enclosure and mount (STL Files)
Original price was: $20.00.$10.00Current price is: $10.00.
-
STL Model Files for Enclosure and mount for LightBurn camera module (both 5MP and 8MP files included)
NOT AN ACTUAL PHYSICAL OBJECT!!! Requires 3D printer access.
Mounts with double sided sticky tape.
We now include STL files for both 5 MP and 8 MP (4K) LightBurn camera module enclosures!
NOTE: This is not a physical product, it’s a downloadable STL files for universal mount for Lightburn Camera
You will need an access to 3D printer to make final product. We also offer a physical version of this product.
IMPORTANT! This model is licensed only for NON commercial licence. Any reselling or reproduction of this model without our consent is not allowed.
If you using Lightburn software for your laser cutter/engraver, it now supports a camera module. This enclosure will let you install this camera module to your laser machine. Enclosure swivels up/down on a simple mount and attaches to top of your laser cover with double-sided tape.
Please note that this enclosure fits only official Lightburn camera modules (Files for both 5MP and 8MP version are included). Type of lens is not important, it should work with all of them.
3D Print Settings
Approximate print time: 1 hr 35 min
We recommend using PLA filament of your choice. Recommended settings:
- Infill: 25-50%
- Layer Height: 0.2 mm
- No Supports
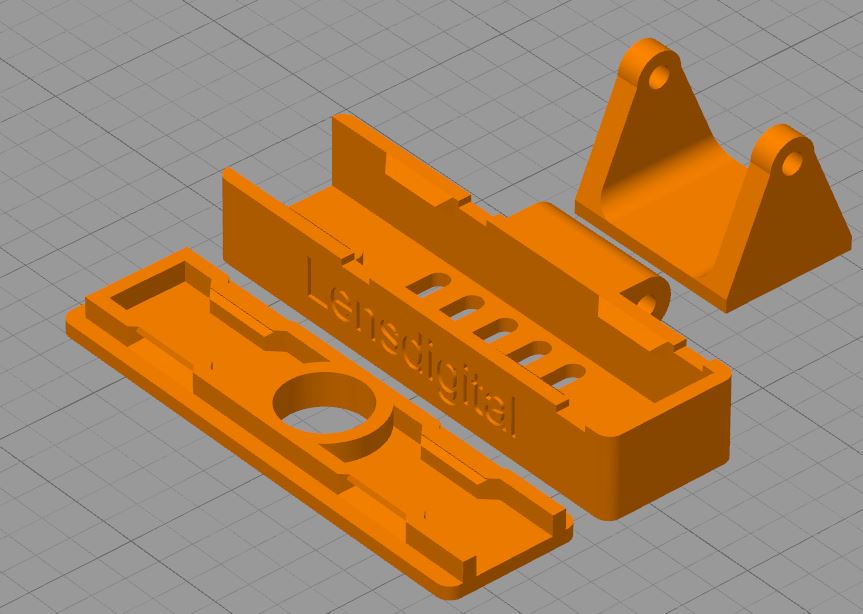
Suggested 3D print arrangement:
Required Hardware:
You will need:
- (3) M2 x 3 mm machine screws
- M3 x 30 mm machine screw
- M3 Nut
- Double-sided sticky tape (no larger than 27 mm x 20 mm piece)
Bonus Mounts:
We also include STL files for
- Standard Go Pro Double sided sticky tape (rounded)
- Tripod Mount (thread 1/4″ tripod nut into the hole)
- 2 axes mount for Boss LS1630 machine door handle (requires (2) M4 x 30 mm machine screws and (1) M4x10 mm machine screw and M3 nut).
How to Assemble
3D print enclosure’s main case, top cover and swivel mount.
Standard files to be printed:
- 5MP_LB_Camera_Main_Case_R1.3.stl (Main Bottom part enclosure for 5MP camera module)
- 5MP_LB_Camera_Cover_R1.stl (Top Cover for 5MP camera module)
- 8MP_LB_Camera_Case.stl (Main Bottom part enclosure for 8MP camera module)
- 8MP_LB_Camera_Cover.stl (Top Cover for 8MP camera module)
- LB_Camera_Adhesive_Mount_R1.stl (Universal Adhesive Mount)
First position camera module inside, and secure with three M2x3mm machine screws. Don’t over-tighten.
Position top cover with open end to the same direction as open end of the main case. Check that hole is big enough to pass over your camera lens. Press it down until it latches on and stays securely. If you need to remove top cover, pry it with flat screwdriver using 4 recessed notches on the sides.
Position swivel mount over main case hinge and thread thru M3x30mm machine screw (long one). Secure with M3 cap nut on other end. Loosen nut to turn camera up or down for correct positioning.
Find good spot on your laser cover to attach mount. Clean it with alcohol for better adhesion. Orient camera so that wire coming out the right side, peel protective film from double sided tape on the mount and attach to the cover. Double sided tape is very strong, but can be removed if you have to.


