


Complete Boss Laser Mirrors Alignment Tool Digital Download (STL Files)
$15.00
-
A quick and easy mirror calibration tool-set for Boss Laser. Please read full description below for compatible models and instructions!
Say no to sticky tape
Please Note:
NOT A PHYSICAL PRODUCT! These are collection of files so you can 3D print your own set of alignment Tools
Compatible ONLY with BOSS LASER LS Series.
It will NOT WORK with any other machine.
Kit is PARTIALLY compatible with Boss HP series lasers (3rd mirror bracket will not fit).
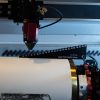
Until now, the only way to align mirrors on your laser machine was by sticking painter’s tape, burning a spot on it, and painstakingly try to figure how far off your beam is from the center. What a PAIN!
We have great news: You need not mess with sticky tape anymore…
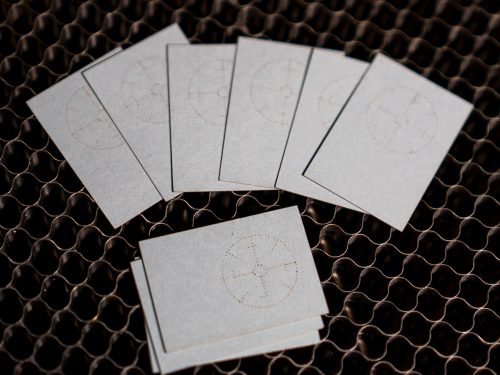
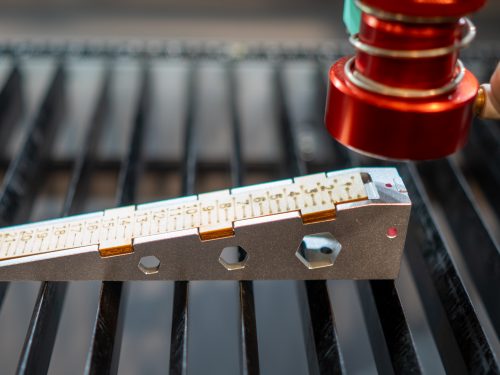
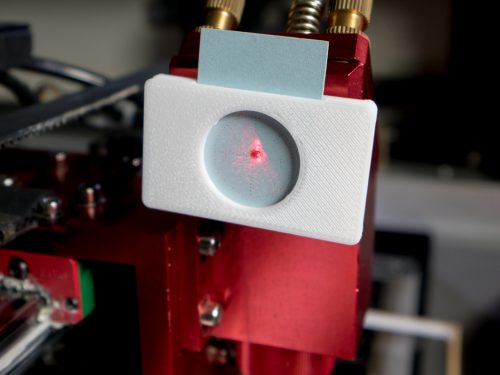
We’ve developed a custom alignment toolset that clips right onto the mirror holders. Once attached, all you have to do is insert a piece of thick paper, or what we call the “target indicator” (pack of 30 is included), and pulse your laser. The burn mark will show precisely how centered your mirrors are, thanks to the crosshairs on the target indicator. If it’s off, turn the adjustment screws of the mirror to compensate. Repeat the process until it’s perfect.
Viola! You are aligned with no sticky mess to clean up.
The process is essentially the same as aligning with adhesive tape, but much more precise and completely free of the mess.
Check it out in this instructional video:
Ran out of target indicators? You can make more from cardstock yourself, right on your laser. The template and settings are included. You can even print them out on an inkjet printer and cut them out with scissors if in a pinch.
Here’s to print your own set on a 3D printer. We recommend printing these with PLA filament. Use 100% infill and 0.2 mm or smaller layer thickness.
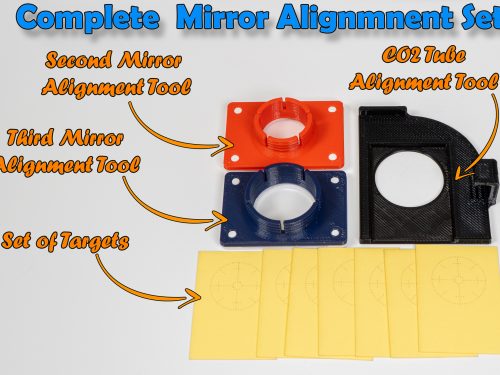
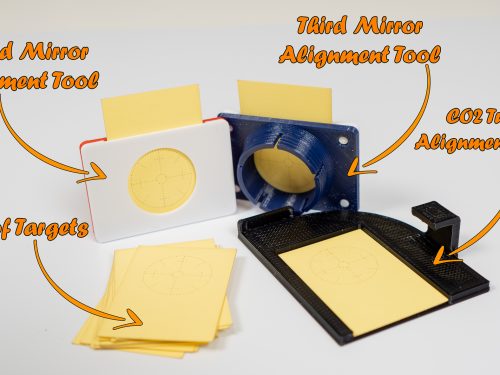
- First Mirror/CO2 Tube Bracket
This one requires supports for the “hanger” piece. Print “1st Mirror.stl” at 100% infill and then remove support material. - Second Mirror Bracket:
Both the Second and 3rd mirror Brackets have identical bases, so print two copies of “universal base.stl“. Use 100% infill and fine layers because there are small pins.
Then print “2nd Mirror TOP.stl”
Apply plastic Glue to both pieces and press them together until pins of the “base” part go into holes on the top part - Third Mirror Bracket:
The assembly is identical to 2nd Mirror Bracket. Print and glue in “3rd Mirror TOP.stl” to the “universal base”.
Usage Instructions:
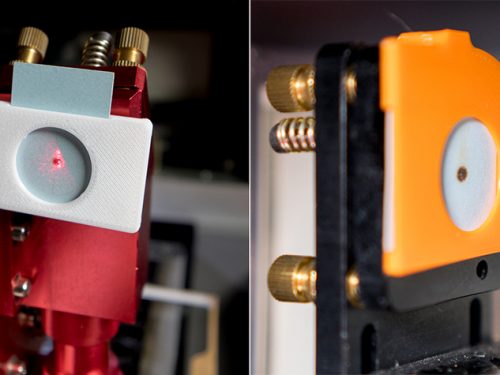
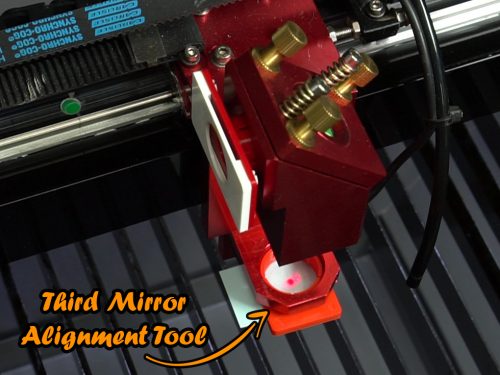
- Attach the larger bracket to 1st mirror to align your CO2 tube
- Attach the same bracket to 2nd mirror to align 1st mirror
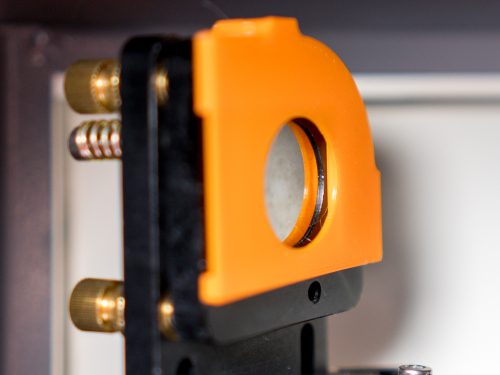
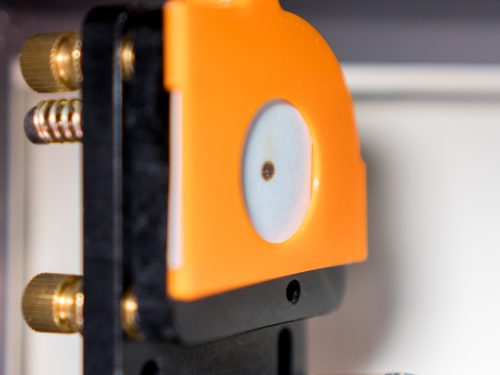
- Attach the smaller bracket to the laser head that holds 3rd mirror to align 2nd mirror
Insert it into a large hole, but DO NOT push it in all the way, just as long as it stays in it’s fine! - Finally to attach the 3rd mirror alignment tool (larger diameter than, remove lens hosing and insert tool instead).
Target Indicator Template
Please use this link to download the template for making your own target indicators.
In the archive, we’ve included PDF, AI, DXF, RLD (RDWorks 8), and LBR (lightburn) files.
New!: PDF file allows you to make targets much more quickly by printing them on your printer and then using the “Print And Cut” feature in Lightburn (project “target_template_print_and_cut” is also included!)
We suggest using sheets of heavy card-stock paper. Note: For different power lasers, settings will be different. For 60-65W machines we suggest the following settings:
- Paper Engraving (crosshairs):
Speed: 350 mm/s
Power: 8% (check if your machine will fire at power this low)
Mode: Dot (Spacing 0.80mm, Time 3 ms) - Paper Cutting:
Speed: 100 mm/s
Power:20%